Professional Teeth Whitening Procedure in Green Bay, WI
A Practical Guide to Safe, Effective Cosmetic Procedure
If you’ve been putting off professional whitening because you’re not sure what the procedure actually involves, you don’t have to worry any longer. A lot of patients come to us having only experienced drugstore whitening strips, and they’re surprised by how different (and how much easier) a professional whitening procedure really is. No guessing, no ill-fitting trays, and no weeks of hoping something is happening. Just a controlled, clinically designed process that works.
Below, Dr. Daniel Fama and Dr. Kyle Whiteside walk through every step of both our in-office whitening procedure using the Colgate Optic White® Professional system and our take-home options—Opalescence Go™ and Opalescence PF™—so you can walk in knowing exactly what’s going to happen and what to do before and after to get the best possible result.
Call our Green Bay dental office at (920) 339-8980. Serving Green Bay, Allouez, De Pere, and surrounding areas.
How Professional Teeth Whitening Works
Before we walk through the steps, it helps to understand what’s actually happening inside your tooth during whitening. This isn’t just academic; it explains why professional whitening works so much better than over-the-counter products, why the procedure takes the amount of time it does, and why aftercare matters as much as it does.
Both in-office and take-home systems use peroxide-based bleaching agents—either hydrogen peroxide (HP) or carbamide peroxide (CP). Here’s what happens the moment the gel contacts your enamel:
- Penetration: The peroxide molecules are small enough to pass through the semipermeable enamel surface and into the underlying dentin layer. This is why whitening works on deeper staining, not just surface discoloration.
- Oxidation: The peroxide releases free oxygen radicals. These unstable molecules react aggressively with the organic, carbon-based compounds responsible for tooth discoloration—called chromogens. Chromogens are long-chain molecules with complex structures that absorb visible light and give stains their color.
- Breakdown: The oxidation reaction breaks the chromogen molecules apart, converting them into shorter chains that no longer absorb light in the same way. The result is that the stains become colorless or dramatically lighter.
- Carbamide peroxide note: Carbamide peroxide (used in Opalescence PF take-home systems) first breaks down into urea and hydrogen peroxide in the presence of saliva and moisture—then the hydrogen peroxide does the work described above. This two-step breakdown is why carbamide peroxide is gentler and more gradual than straight hydrogen peroxide, making it ideal for take-home use.
- Why LED light helps: In the Colgate Optic White Professional in-office system, an LED device is used to activate and accelerate the hydrogen peroxide reaction. Light energy excites the peroxide molecules, triggering faster release of oxygen radicals. This is why in-office results can be achieved in under an hour rather than over days.
This also explains one critical aspect of aftercare: immediately after whitening, your enamel’s pores are temporarily dilated from the peroxide activity. For 48 hours, your teeth are more vulnerable to re-staining from pigmented foods and drinks, which is why what you eat and drink after the procedure matters as much as the procedure itself.
Before Your Appointment: How to Prepare for Whitening
Professional whitening is straightforward to prepare for—but a few steps beforehand will make a meaningful difference in how your procedure goes and how well your results hold.
1–2 Weeks Before: Address Any Outstanding Dental Issues
Whitening should only be done on a healthy mouth. Active cavities, gum disease, or cracked enamel should be treated first—bleaching agents can irritate exposed dentin or inflamed gum tissue and cause significant discomfort. If you haven’t had a cleaning recently, scheduling one before whitening also helps by removing surface plaque and tartar that can block the gel from contacting your enamel evenly.
A Few Days Before: Note Your Existing Dental Work
Dental crowns, dental veneers, tooth-colored fillings, and implant crowns don’t respond to bleaching agents—they’ll stay exactly their current color while your natural enamel whitens. If you have visible restorations in your smile zone, flag this at your consultation. Your dentist will discuss whether replacement restorations might be needed after whitening to maintain a consistent shade throughout your smile.
24 Hours Before: Ease Up on Staining Foods
It’s not strictly required, but cutting back on coffee, tea, red wine, and dark-pigmented foods the day before your appointment gives you a slightly cleaner baseline for whitening. No dramatic dietary changes needed—just be mindful.
Day of Appointment: Brush and Floss Thoroughly
Arrive with clean teeth. Brush and floss before your appointment to remove any food debris, and don’t use any whitening toothpaste that day—the abrasives in some whitening toothpastes can cause minor enamel irritation that increases sensitivity during treatment. If you have a history of tooth sensitivity, let our team know when you arrive so we can factor that into how we approach your procedure.
Already a patient at Allouez Family Dental? We’ll review your chart and oral health history at your consultation and let you know if anything needs to be addressed before we whiten. New to the area and looking for a cosmetic dentist near you in Green Bay or Allouez? Call us at (920) 339-8980—we welcome new patients from throughout the greater Green Bay area.
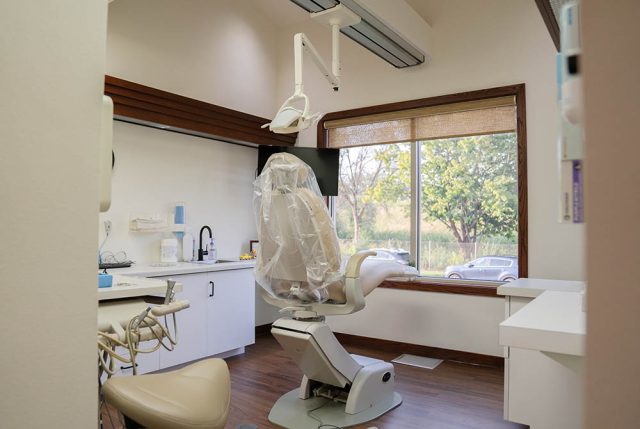
The In-Office Whitening Procedure: Step-by-Step
Our in-office whitening procedure uses the Colgate Optic White® Professional system—a combination of a 10% hydrogen peroxide precision serum and a rechargeable LED whitening device. Here’s exactly what happens from the moment you sit down to the moment you see your results.
In-Office: Colgate® Optic White® Professional Procedure
Total appointment time: Approximately 60–90 minutes, including preparation and post-treatment review.
- Pre-treatment shade assessment. Your dentist uses a clinical shade guide to document your current tooth color. This gives you a concrete “before” baseline so you can see exactly how many shades your teeth change. Photographs are often taken at this stage as well.
- Professional dental cleaning (if not recently done). Any surface plaque, tartar, or debris is gently removed. Whitening gel needs direct, unobstructed contact with enamel to work evenly—starting with a clean surface means more consistent results across all teeth.
- Gum tissue protection. Unlike older whitening systems that required a separate gingival barrier gel, Colgate Optic White Professional’s precision pen formula dries quickly into a smudge-resistant film on the tooth surface, staying put and minimizing contact with gum tissue. Your dentist will still apply protection to ensure your gums are fully comfortable throughout.
- Application of the whitening serum. Using the precision pen applicator, your dentist applies the Colgate Optic White Professional whitening serum evenly across all visible tooth surfaces. The pen design allows for precise, controlled coverage—no overloaded trays, no pooling gel near the gumline.
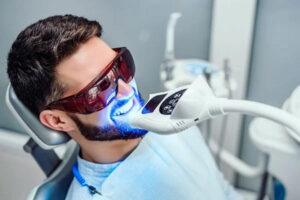
- LED activation—Cycle 1 (10 minutes). The LED whitening device is positioned over your teeth. You relax comfortably in the chair while the light activates and accelerates the hydrogen peroxide reaction. Most patients describe the sensation during this stage as nothing—just light. Some report a very mild tingling, which is completely normal and not a sign of damage.
- Gel reapplication—Cycle 2 (10 minutes). After the first cycle, the serum is refreshed, and the LED device is activated again. This second cycle continues deepening the whitening effect.
- Final application—Cycle 3 (10 minutes). A third and final cycle completes the in-office treatment. The three-cycle protocol is specifically designed to maximize peroxide activity while keeping enamel contact time within safe clinical limits.
- Post-treatment shade comparison. The gel is removed, and your teeth are gently rinsed. Your dentist compares your new shade to your pre-treatment baseline using the shade guide. Most patients see a 6–7+ shade improvement after a single session. This is the moment most patients get genuinely excited—the results are immediately visible.
- Aftercare instructions. Before you leave, we walk through exactly what to do in the next 48 hours to protect and maximize your results—what to eat and avoid, how to manage any sensitivity, and when to come back for a touch-up if you want to maintain your brightness. You’ll leave with written instructions so nothing is forgotten.
The Take-Home Whitening Procedure: Step-by-Step
For patients who prefer to whiten at home—whether for convenience, sensitivity management, or ongoing maintenance—we offer two professional-grade take-home systems: Opalescence Go™ and Opalescence PF™. Both contain the Opalescence PF formula (potassium nitrate and fluoride), which protects enamel and reduces sensitivity throughout the process. Here’s how each procedure works.
Take-Home: Opalescence Go™—Prefilled Tray Procedure
Opalescence Go is designed for patients who want to start whitening right away without any additional appointments or custom impressions. The UltraFit™ trays are prefilled and adapt to virtually any smile shape.
Available in: 10% hydrogen peroxide (wear 60–90 minutes/day) or 15% hydrogen peroxide (wear 30–60 minutes/day). · Treatment duration: 5–10 days
- Receive your kit at your appointment. Your dentist will confirm which concentration (10% or 15%) is right for you based on your sensitivity history and how quickly you want results. The kit contains individual tray packets—one upper, one lower—for each day of treatment.
- Open one tray packet per session. Each packet contains a prefilled upper and lower tray. Peel back the cover to expose the gel-loaded tray. Do not rinse or touch the gel surface.
- Seat the trays on your teeth. The UltraFit™ tray material is soft and adapts to your tooth contours as you seat it. Press gently but firmly to ensure the gel makes full contact with all tooth surfaces. The trays are designed to stay in place without clenching.
- Wear for the prescribed time. For 10% HP: wear 60–90 minutes. For 15% HP: wear 30–60 minutes. You can watch TV, read, or work during this time—the trays are comfortable enough to go largely unnoticed. Avoid eating or drinking (other than water) while wearing them.
- Remove and discard the trays. Gently remove both trays and dispose of them—each tray is single-use. Rinse your mouth with water to remove any residual gel.
- Brush gently (optional). You can brush lightly after removing trays to freshen up. Use a soft-bristle brush and avoid a whitening toothpaste during your treatment period, as the additional abrasives are unnecessary and can increase sensitivity.
- Repeat daily for 5–10 days. Most patients see a noticeable improvement within 3–5 days and reach their target shade by day 7–10. If you experience sensitivity, skip a day and resume. The potassium nitrate in the formula helps calm nerve activity with continued use.
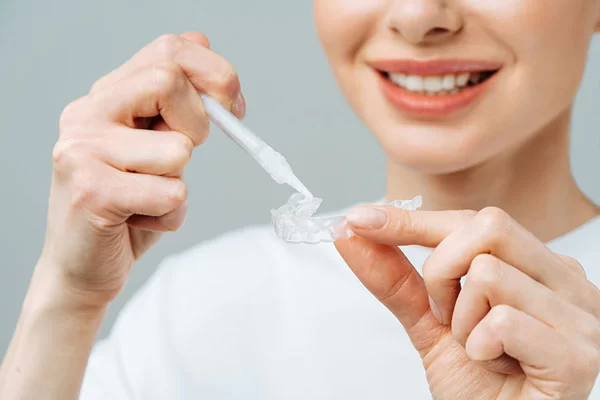
Custom Take-Home: Opalescence PF™—Custom Tray Procedure
Opalescence PF is the most personalized take-home whitening procedure available. Custom trays made specifically from your dental impressions ensure the gel covers every tooth surface evenly and minimizes gel contact with your gums. Available in four carbamide peroxide concentrations for precise sensitivity control.
Available in: 10% CP (wear 8–10 hours or overnight) · 15% CP (wear 4–6 hours) · 20% CP (wear 2–4 hours) · 35% CP (wear 30 minutes) · Treatment duration: 5–10 days, depending on concentration
- Dental impressions appointment. Before take-home whitening begins, your dentist takes precise impressions of your upper and lower teeth. These are used to fabricate custom-fitted trays in a dental lab. You typically pick up your trays at a second short appointment within a few days.
- Load the gel into your trays. Using the provided syringe, place a small dot of Opalescence PF gel into each tooth space in the tray—approximately 1/4 to 1/3 of each tooth compartment. You do not need to fill the tray fully. Overfilling leads to excess gel on the gums, which can cause irritation.
- Seat the trays on your teeth. Insert both trays and press firmly to ensure the gel spreads to contact all tooth surfaces. Your custom fit means the tray seals closely against your teeth with minimal overflow.
- Wipe away any excess gel from the gumline. If any gel squeezes out onto your gums, use a clean fingertip or cotton swab to gently remove it. The PF formula is gentle, but reducing unnecessary gum contact improves comfort during longer wear sessions.
- Wear for the prescribed time. Wear time depends on the concentration prescribed by your dentist: 30 minutes for 35% CP up to overnight for 10% CP. The slower, lower-concentration approach is particularly effective for patients with sensitivity, as the potassium nitrate has an extended time to work on nerve activity while the carbamide peroxide whitens gradually.
- Remove and rinse the trays, and rinse your mouth. After each session, remove your trays and rinse them under cool water—never hot, as heat can warp the tray material. Rinse your mouth with water. Store your trays in their provided case.
- Repeat daily or every other day for 5–10 sessions. Your dentist will advise the right frequency based on your concentration and sensitivity. The custom trays are reusable and last for years, so any future touch-up syringes can be loaded into the same trays.
Which take-home system is right for you? Opalescence Go is the faster start—no impressions, begin whitening the same day. Opalescence PF with custom trays is more precise and more economical long-term, since the trays are reusable and additional gel syringes are inexpensive. Not sure? We’ll guide you at your consultation based on your timeline, sensitivity history, and goals.
What You’ll Feel During and After the Whitening Procedure
One of the most common questions we hear from patients considering whitening for the first time is, “Will it hurt?” The answer for most people is no—but let’s be specific about what sensations are normal, what’s temporary, and when to reach out to us.
Mild tingling or buzzing sensation
- When: During the in-office LED treatment cycles.
- What it means: Normal — the peroxide is actively working on your enamel.
- What to do: Nothing. It resolves on its own once the cycle ends.
Sensitivity to hot and cold
- When: During treatment or up to 48 hours after.
- What it means: Normal — enamel pores are temporarily more open after whitening.
- What to do: Switch to a sensitive toothpaste and avoid very hot or cold foods and drinks for 48 hours.
Mild gum irritation
- When: After take-home tray sessions.
- What it means: Usually caused by gel making contact with gum tissue — easy to prevent.
- What to do: Use less gel in your tray next session, skip a day if needed, and wipe excess gel from the gumline immediately after seating the tray. Irritation typically resolves within 1–2 days.
Sharp “zingers” — brief shooting sensitivity
- When: During treatment or within a few hours after.
- What it means: Normal — a temporary spike in nerve excitation as the peroxide works through the enamel.
- What to do: They pass quickly on their own. An over-the-counter pain reliever like ibuprofen can help if they’re bothersome.
Persistent sensitivity beyond 3–4 days
- When: Any time after treatment that doesn’t resolve within a few days.
- What it means: Warrants a conversation with your dentist — this isn’t typical and should be checked.
- What to do: Contact our Green Bay office at (920) 339-8980. We’ll advise on next steps and can recommend a desensitizing treatment if needed.
One important note: the systems we use—Colgate Optic White Professional and Opalescence—are specifically formulated to minimize sensitivity. Opalescence’s PF formula (potassium nitrate + fluoride) addresses sensitivity at the source: potassium nitrate calms the nerve transmission inside the tooth, while fluoride remineralizes and strengthens enamel after each whitening session. Many patients who have struggled with sensitivity using OTC strips find professional systems significantly more comfortable.
The 48 Hours After Your Whitening Procedure—What to Do and What to Avoid
The 48-hour window after whitening is the most important period for protecting your results. During treatment, the peroxide activity temporarily widens the micropores in your enamel surface. While this is what allows the bleaching agent to penetrate and break down deep stains, it also means your teeth are temporarily more porous and more susceptible to reabsorbing pigment from food and drinks. What you put in your mouth in the next two days can meaningfully affect how long your results last.
Avoid these for 48 hours after your whitening procedure:
- Staining Foods and Drinks: Coffee, tea, red wine, dark sodas, grape juice, and cranberry juice; tomato sauce, soy sauce, balsamic vinegar; berries, beets, and dark-pigmented fruits; mustard, ketchup, and curry; tobacco (smoke or chew); and colored mouthwash (rinse with water or alcohol-free clear rinse instead)
- What you can eat and drink: Water (always a safe choice), white wine, clear spirits, milk, bananas, apples, pears, white bread, pasta, chicken, fish, and most dairy. If coffee is non-negotiable, use a straw to reduce contact with your front teeth and rinse with water immediately after.
- Oral hygiene during this window: Continue brushing and flossing normally—clean teeth are less likely to pick up staining even with open enamel pores. Switch to a sensitivity toothpaste for the first week if you’re experiencing any discomfort, and avoid whitening toothpastes temporarily (the abrasives aren’t necessary and can be irritating on recently whitened enamel).
Long-Term Care After Your Whitening Procedure
After the 48-hour window, your enamel pores close back down, and your teeth return to their normal, less porous state. You can return to your regular diet and routine—but how you treat your whitened smile from here determines how long your results last. Most patients enjoy noticeably whiter teeth for 6 months to 2 years. Here’s what makes the difference.
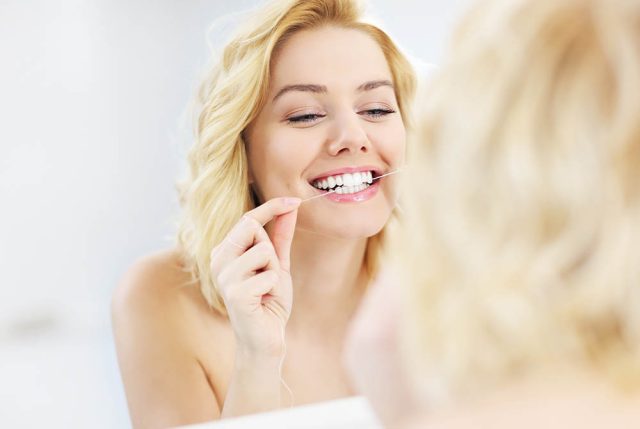
Maintain a Strong Oral Hygiene Routine
Brush at least twice daily with a soft-bristle brush and fluoride toothpaste. Floss once daily. The mechanical action of brushing removes surface chromogens before they have time to set—it’s the single most effective long-term whitening maintenance habit you have.
Rinse After Staining Beverages
You don’t have to give up coffee or red wine—just rinse with water within 20–30 minutes of drinking them. This simple habit significantly slows re-staining. Using a straw for iced coffee, tea, and dark sodas also reduces contact with your front teeth.
Attend Your Regular Dental Cleanings
Professional cleanings remove the plaque and tartar buildup that can dull your smile even between whitening treatments. At Allouez Family Dental, our hygienists also polish teeth at cleanings, which removes surface staining that brushing alone can’t always address. Your biannual visit is also the right time to assess whether a whitening touch-up is warranted.
Touch-Up Whitening as Needed
For patients who had in-office whitening, a short take-home touch-up session using Opalescence PF (with the same custom trays from your original procedure) for 2–3 days is usually sufficient to restore brightness. This approach costs a fraction of another full in-office treatment and keeps your smile consistently bright year-round without over-treating your enamel.
How Many Whitening Sessions Will You Need?
For most patients, a single in-office session produces the result they want. The Colgate Optic White Professional system is specifically designed to deliver maximum impact in one appointment—the three-cycle LED protocol is calibrated to do in under an hour what older systems required multiple visits to achieve.
That said, the number of sessions you need depends on your starting shade and the depth of your staining:
- Light surface staining (coffee, tea): One in-office session is almost always sufficient. A take-home touch-up kit for maintenance every 6–12 months is typically all that’s needed going forward.
- Moderate staining: One in-office session followed by a 5–7 day take-home protocol with Opalescence PF is the combination approach that delivers the most complete result. The at-home phase continues to work on stains the in-office session started breaking down.
- Deep intrinsic staining (medication-related, fluorosis): Peroxide-based whitening has limits with very deep intrinsic discoloration. In these cases, your dentist will be direct with you about what whitening can realistically achieve and may recommend porcelain veneers as a more effective and permanent solution.
We never oversell treatment or push additional sessions that aren’t necessary. At your consultation, we’ll give you a realistic picture of what your teeth will look like after whitening—and whether whitening is the right procedure for your specific situation at all.
Professional Teeth Whitening Near You in The Greater Green Bay, WI
Allouez Family Dental is centrally located to serve patients from across the Green Bay area. If you’re looking for a teeth whitening dentist near you in any of the surrounding communities, we’d love to help. We see patients from:
- Green Bay, WI
- Allouez, WI
- De Pere, WI
- Bellevue, WI
- Howard, WI
- Ashwaubenon, WI
Looking for a dentist near you in Allouez or a cosmetic dentist near De Pere who offers professional whitening? We’re a short drive from anywhere in the greater Green Bay area, and new patient appointments are available. Call (920) 339-8980 to check availability.

Frequently Asked Questions
The in-office whitening procedure at Allouez Family Dental takes approximately 60–90 minutes from start to finish. This includes the pre-treatment shade assessment, cleaning, gel application, three 10-minute LED activation cycles, and your post-treatment shade comparison and aftercare review. You can arrive and be done within a single lunch break or afternoon appointment.
Most patients experience little to no discomfort during the procedure. Some feel a mild tingling during the LED cycles, and some experience temporary sensitivity to hot and cold in the 24–48 hours after treatment—this is normal and short-lived. The Colgate Optic White Professional and Opalescence systems are specifically designed to minimize sensitivity. If you’ve had sensitivity issues with whitening before, let our team know so we can adjust the approach for you.
The in-office procedure (Colgate Optic White Professional) uses a higher-concentration hydrogen peroxide formula activated by LED light and is completed in one chair visit of under 60 minutes. The take-home procedures (Opalescence Go or Opalescence PF) use lower-concentration carbamide or hydrogen peroxide formulas worn in trays for 30 minutes to overnight over 5–10 days. In-office is faster; take-home is more gradual and typically better suited for patients with sensitivity. Both deliver professional-grade results that exceed anything available over the counter.
Open one prefilled tray packet, seat the upper and lower trays on your teeth, and wear them for 60–90 minutes (10% HP) or 30–60 minutes (15% HP). Remove and discard it, and rinse your mouth. Repeat once daily for 5–10 days. The UltraFit™ tray material adapts to your teeth without requiring custom impressions. If you experience sensitivity, skip a day and resume—the potassium nitrate in the formula helps your nerves desensitize with continued use
Most patients maintain noticeably whiter teeth for 6 months to 2 years after a professional whitening procedure. Diet, oral hygiene, and lifestyle (especially tobacco use) are the biggest factors. Periodic touch-ups with Opalescence PF take-home gel every 6–12 months are a cost-effective way to maintain results without repeating the full in-office procedure each time.
Ready to Schedule Your Whitening Procedure in Green Bay?
Now you know exactly what to expect. The next step is a quick consultation at Allouez Family Dental—we’ll assess your smile, confirm which procedure fits your goals, and get you scheduled. Most patients are in and out with a dramatically brighter smile in a single appointment. Call our dental office in Green Bay at (920) 339-8980 to schedule your whitening consultation. Serving Green Bay, Allouez, De Pere, Bellevue, Howard, and Ashwaubenon, WI